

Entra ID OIDC-based SSO
Step 1: Register the Application in Entra ID
Open the Azure portal and navigate to Microsoft Entra ID > App registrations > New registration.
Fill in the following:
Redirect URI: Set the platform to “Web” and enter your callback URL. For local development, this is typically https://localhost:3000/auth/callback. For production, use your actual domain.
Name: Something descriptive like “Contoso Web App”
Supported account types: Choose based on your audience. For internal apps, select “Accounts in this organizational directory only.” For multi-tenant apps, choose “Accounts in any organizational directory.”
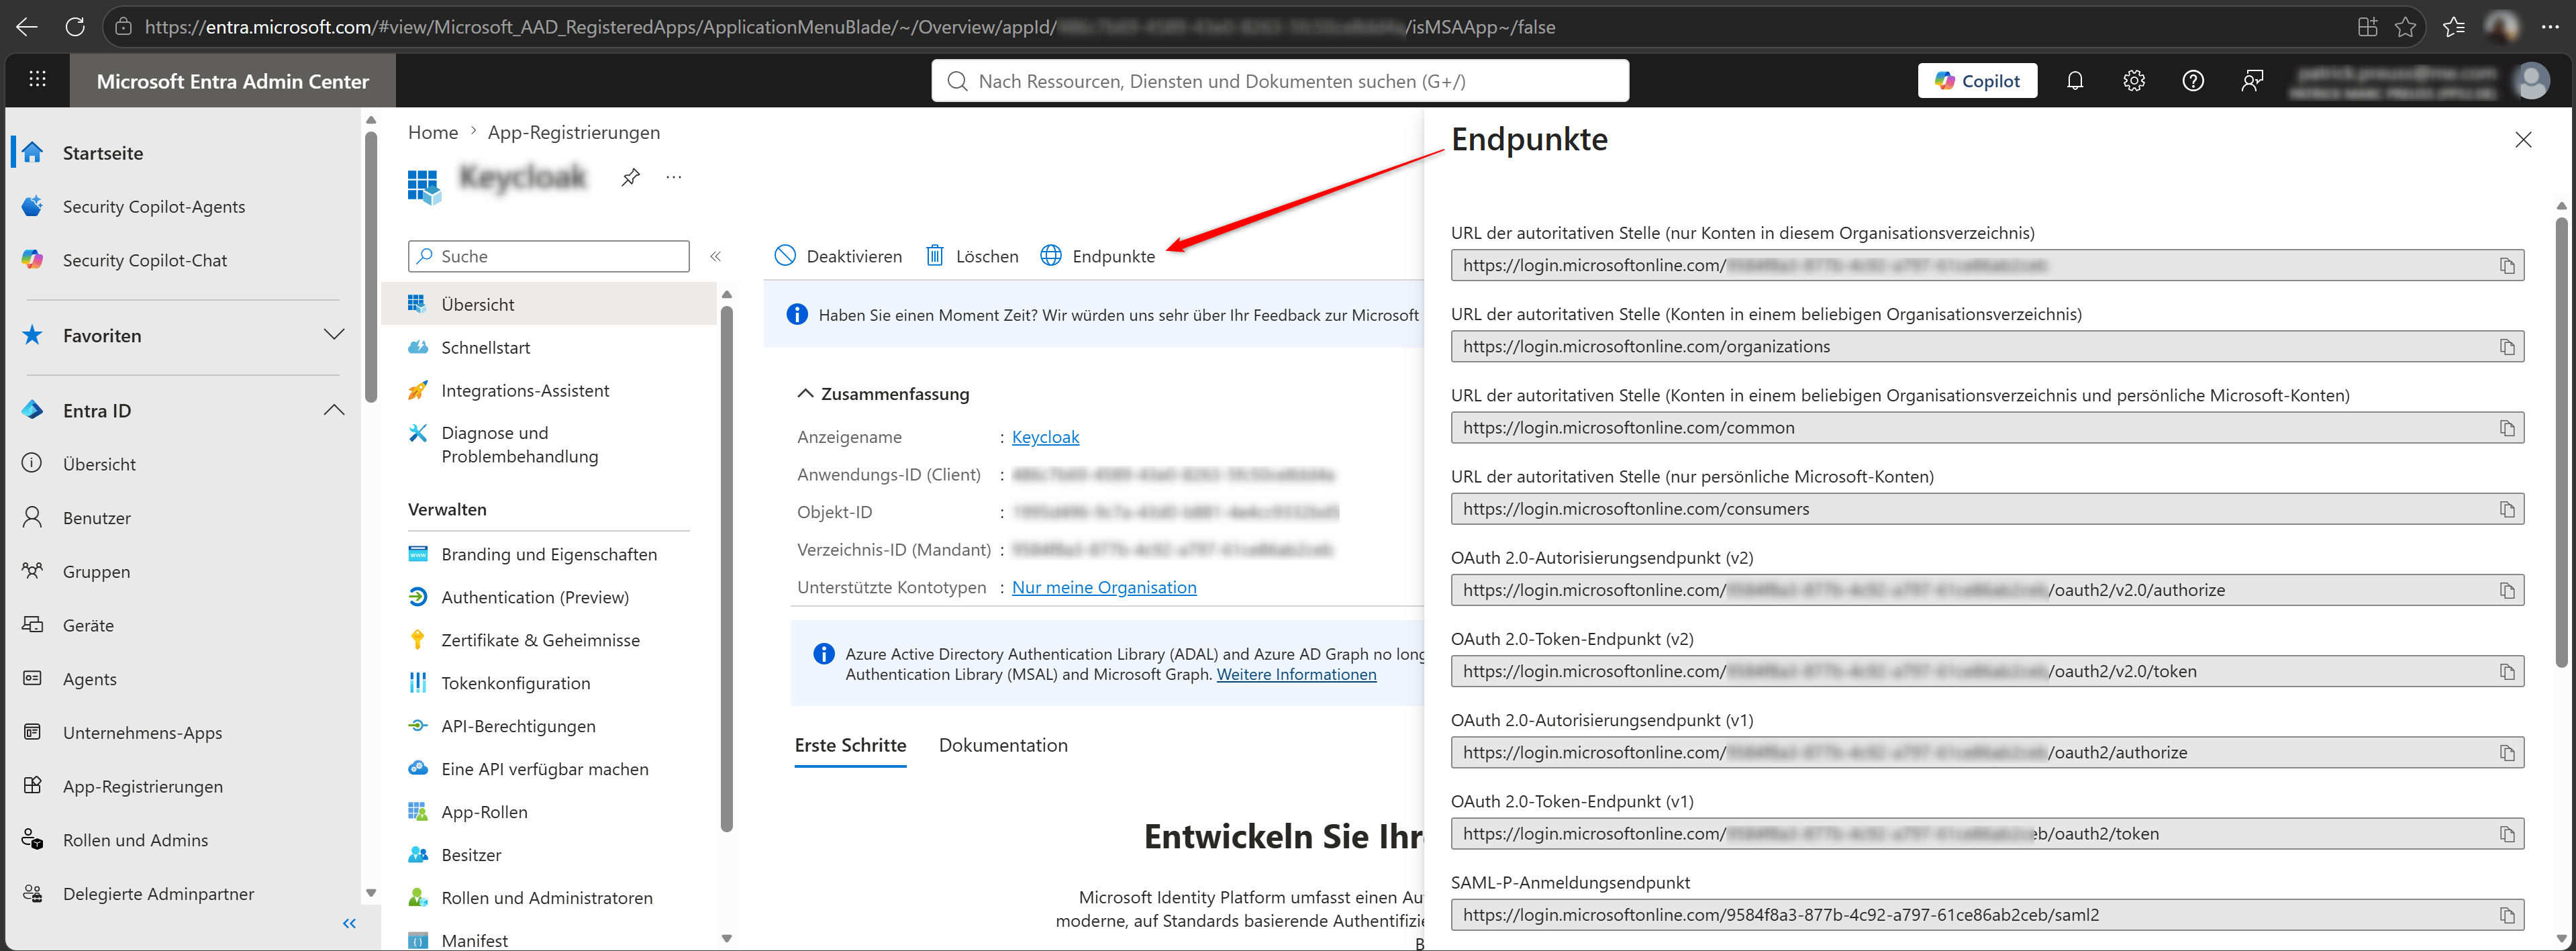
Click Register. Azure will create the application and show you the Overview page with two important values:
- Application (client) ID – uniquely identifies your app
- Directory (tenant) ID – identifies your Entra ID tenant
Copy both of these. You will need them in your application configuration.
Step 2: Create a Client Secret
Your web application needs a way to prove its identity when exchanging the authorization code for tokens. The simplest approach is a client secret.
Go to Certificates & secrets > Client secrets > New client secret. Give it a description and choose an expiration period. I recommend 12 months for production and shorter for development.
Copy the secret value immediately – it is only shown once. Store it in a secure location like Azure Key Vault or your application’s secret manager.
Step 3: Configure API Permissions
By default, a new app registration has the User.Read permission for Microsoft Graph, which lets your application read the signed-in user’s profile. This is usually sufficient for basic authentication.
If you need additional permissions (like reading group memberships or accessing other APIs), add them under API permissions > Add a permission.
For most OIDC scenarios, you want at least these scopes:
openid– required for OIDCprofile– gives you the user’s name and other profile attributesemail– gives you the user’s email address
These are delegated permissions, meaning they act on behalf of the signed-in user.
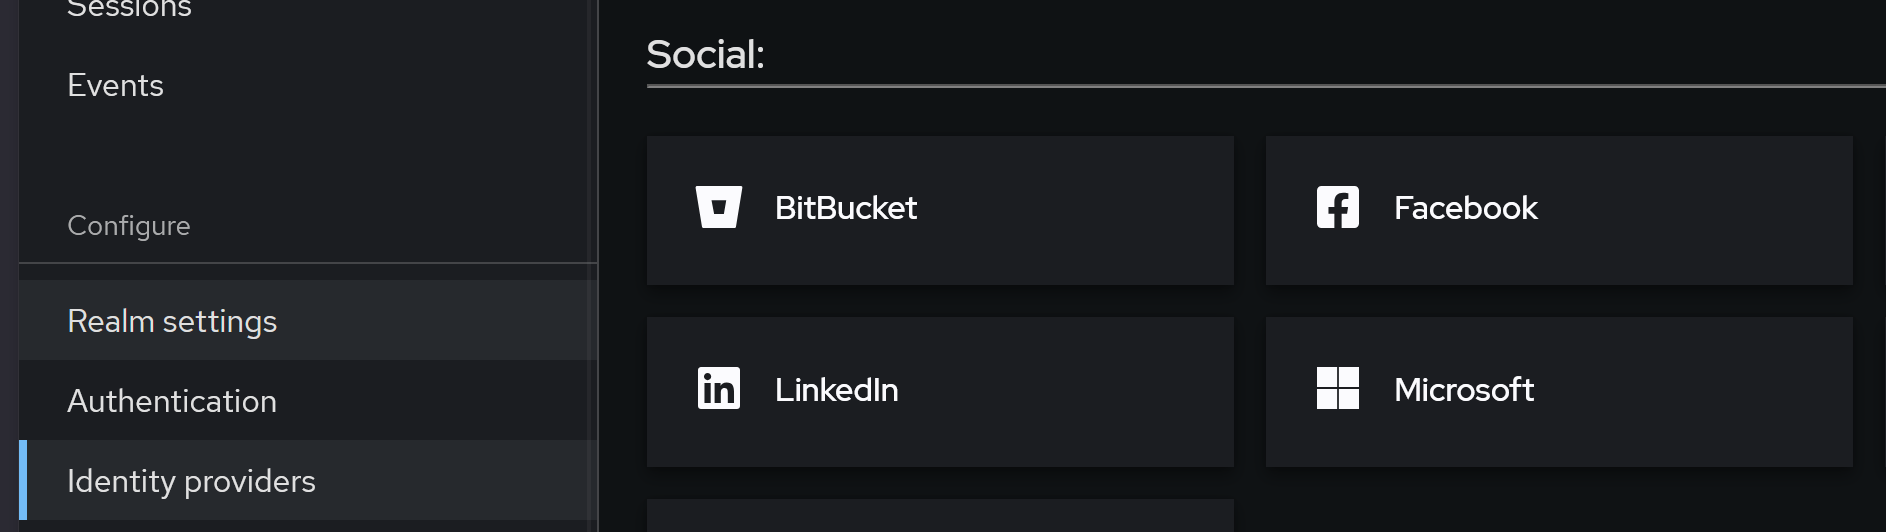
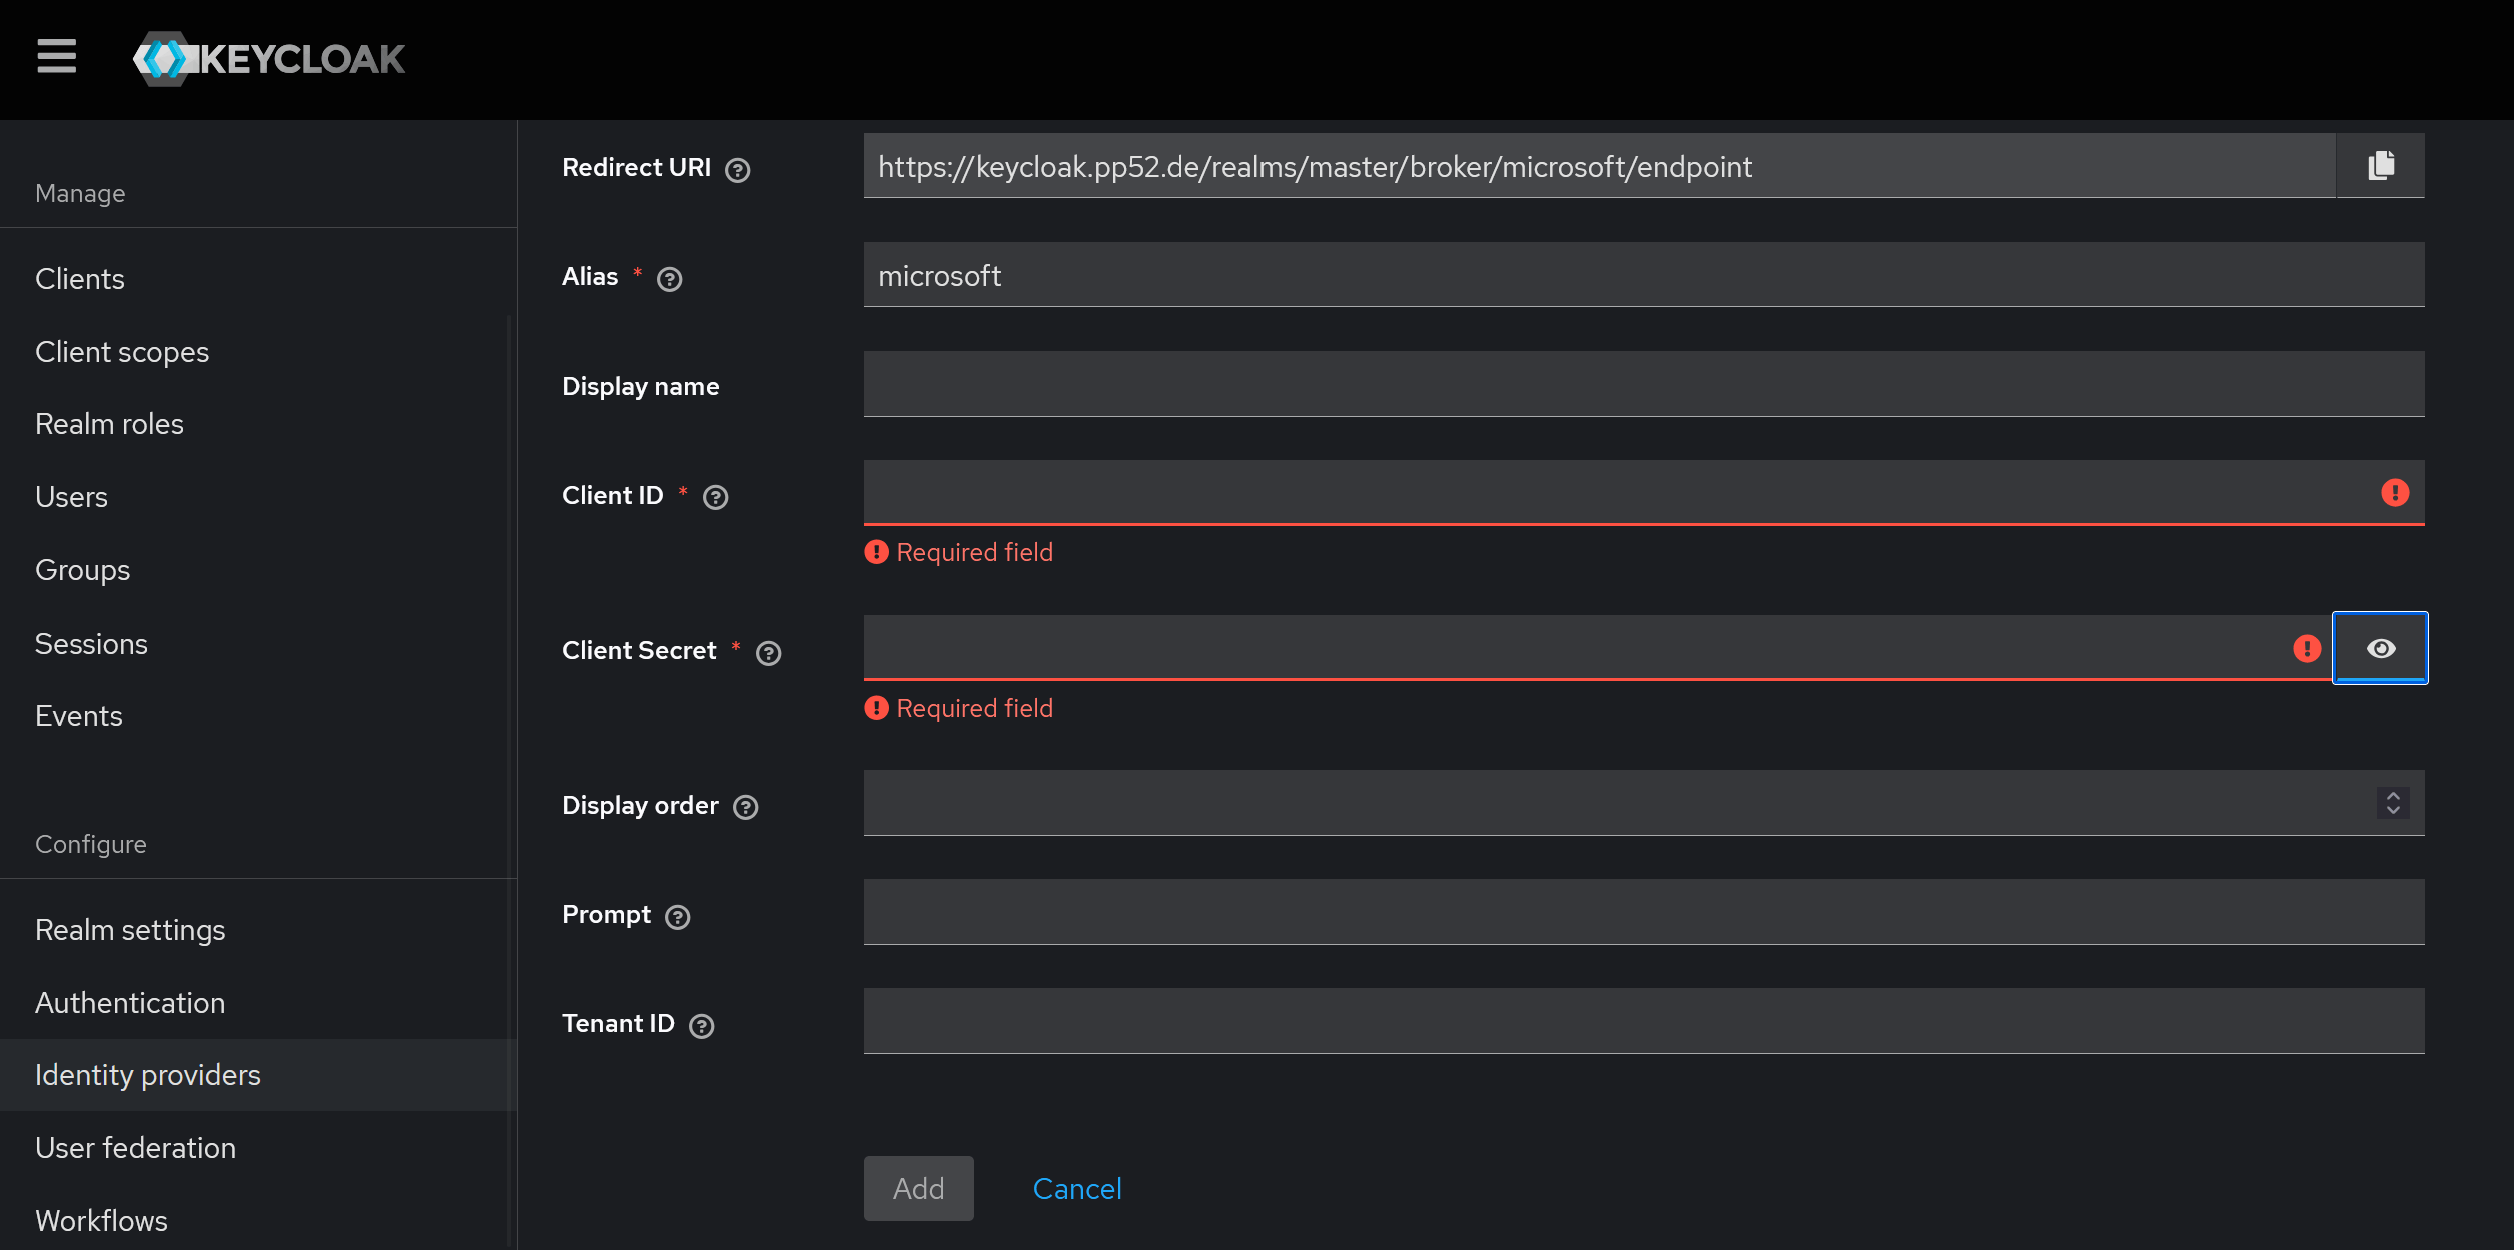
Step 4: Configure Keycloak to use Entra ID
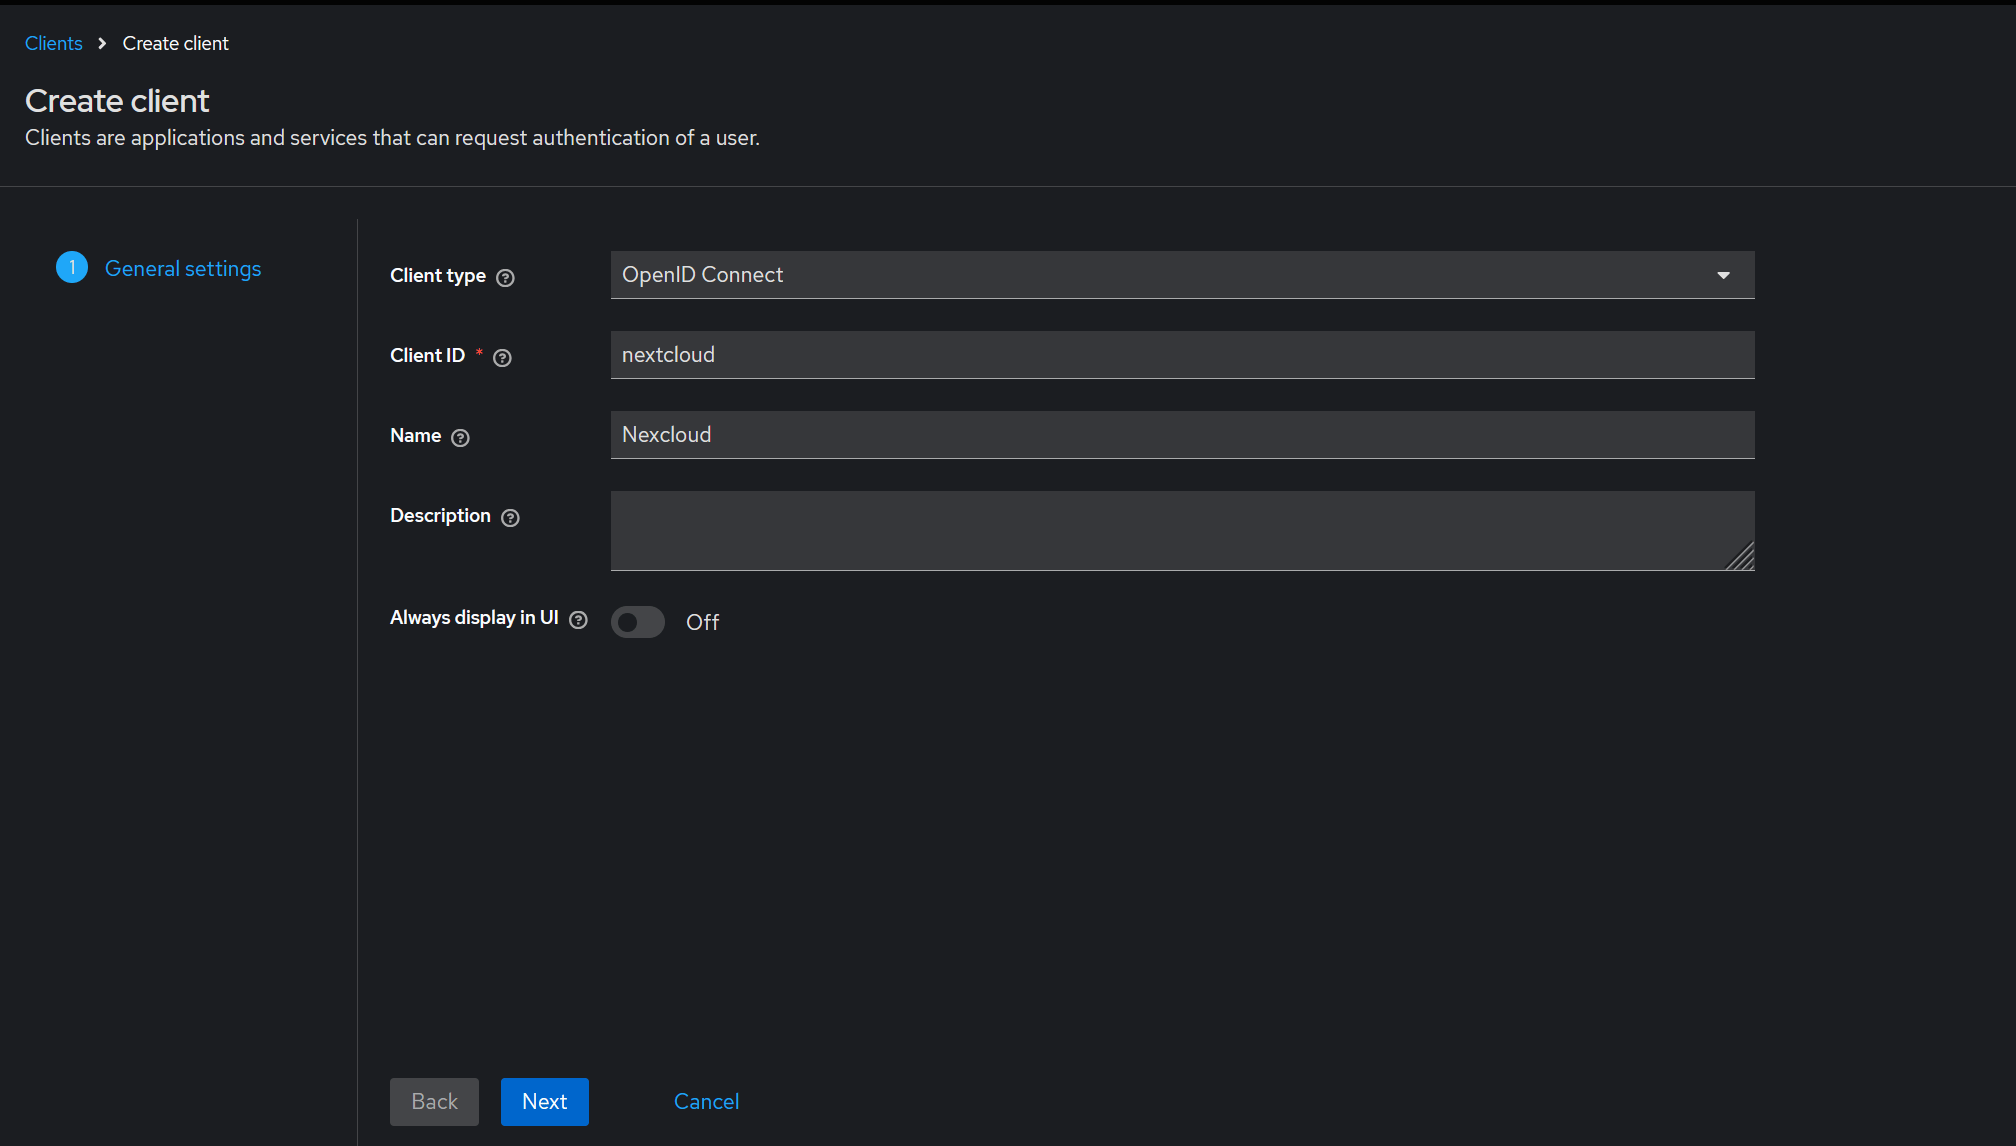
Step 5: Configure Keycloak for Nextcloud
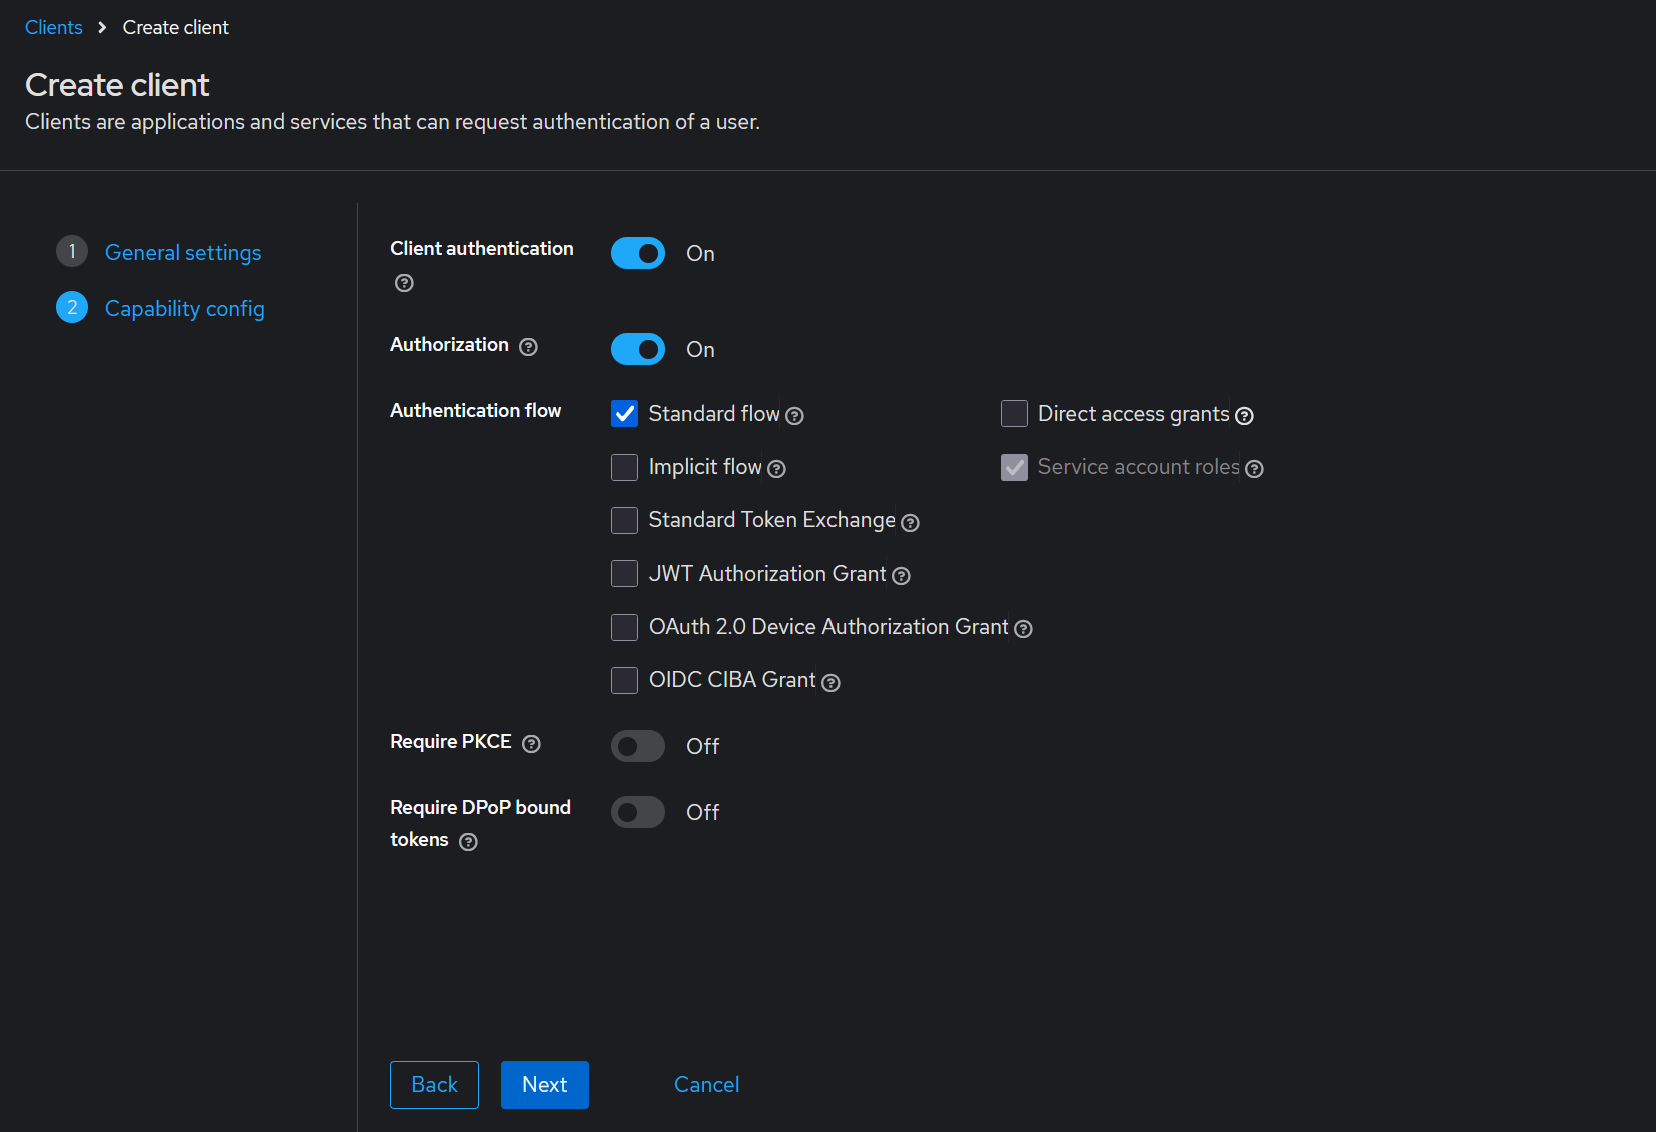
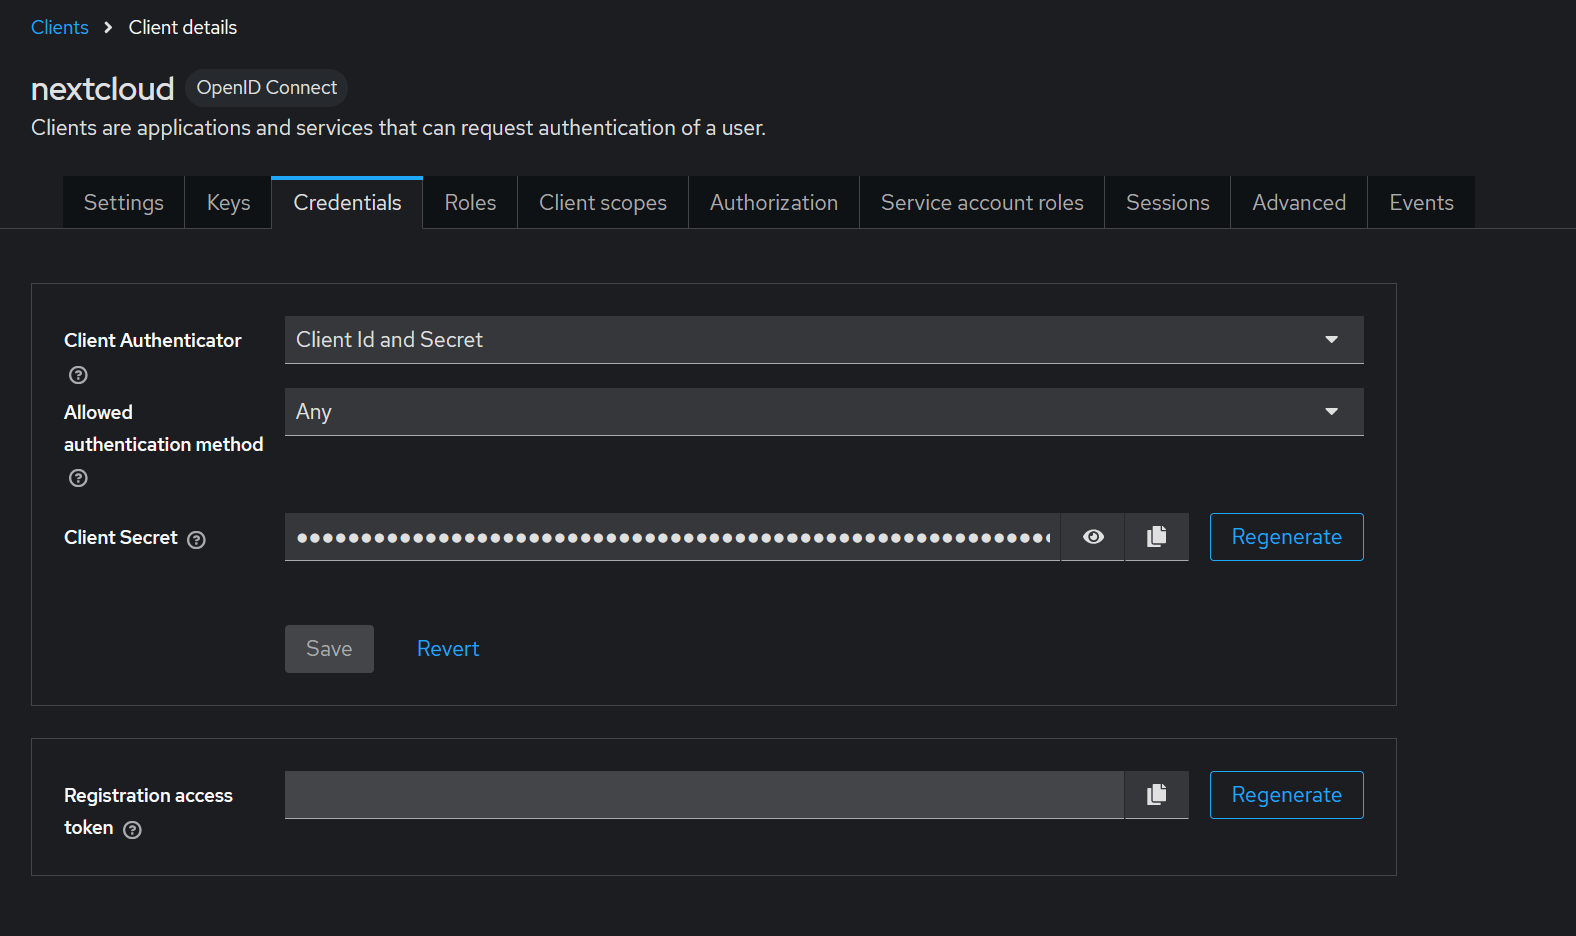
Step 6: Configure Nextcloud
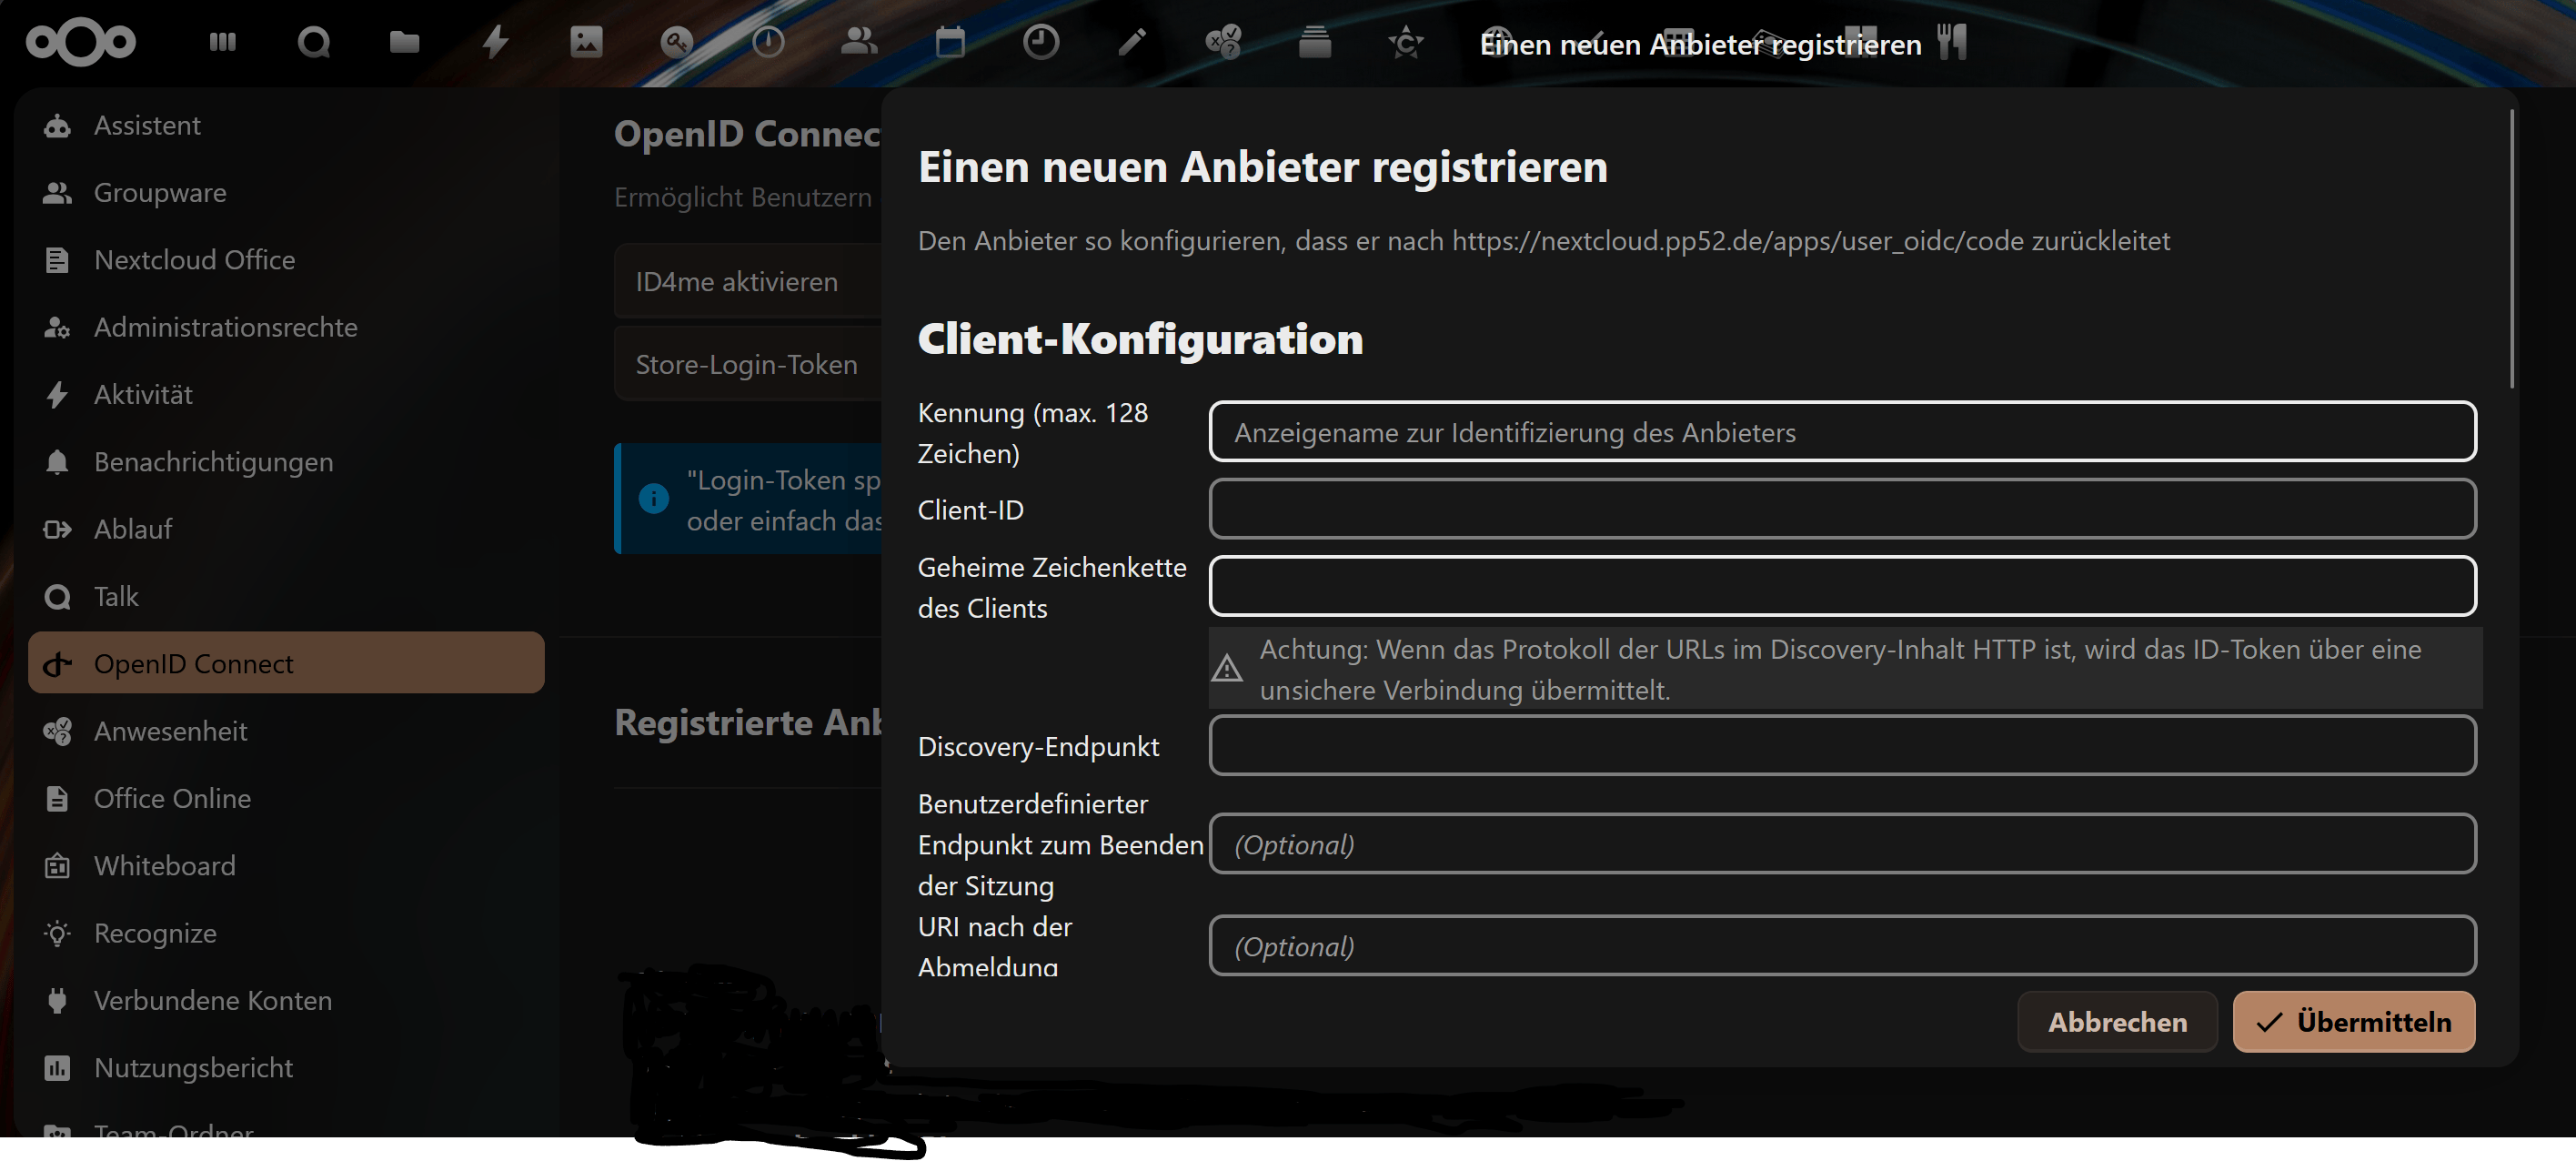
Common Pitfalls
Redirect URI mismatch: The redirect URI in your code must exactly match what you registered in Entra ID. Even a trailing slash difference will cause an error. Check the protocol (http vs https), the domain, the port, and the path.
Wrong authority URL: For single-tenant apps, use https://login.microsoftonline.com/{tenant-id}. For multi-tenant apps, use https://login.microsoftonline.com/common. Using the wrong one will reject users from valid tenants or allow users from tenants you did not intend.
Not handling the state parameter: OIDC uses a state parameter to prevent CSRF attacks. If you are rolling your own implementation or adding your own application state to an MSAL flow, generate a random state value, store it in the session before redirecting, and verify it matches when the callback arrives.
Forgetting to handle errors from Entra ID: The callback URL can receive error responses if the user denies consent or if something goes wrong. Always check for error and error_description query parameters in addition to the code parameter.
Evaluating the Client IP via X-Forwarded-For
When Keycloak runs behind a reverse proxy, it initially sees only the proxy’s IP address. To use the original client IP instead, Keycloak can evaluate the X-Forwarded-* headers.
Enable this in keycloak.conf:
proxy-headers=xforwardedproxy-trusted-addresses=192.0.2.10/32
Alternatively, use environment variables:
KC_PROXY_HEADERS=xforwardedKC_PROXY_TRUSTED_ADDRESSES=192.0.2.10/32
The reverse proxy must set the headers correctly:
proxy_set_header X-Forwarded-For $remote_addr;proxy_set_header X-Forwarded-Proto $scheme;proxy_set_header X-Forwarded-Host $host;proxy_set_header X-Forwarded-Port $server_port;
Afterwards, the original client IP is used in Keycloak login events, error events, and other security-related records.
Only trusted reverse proxy addresses should be configured in proxy-trusted-addresses. Otherwise, clients may be able to submit manipulated X-Forwarded-For headers and falsify IP-based logging or security controls.
Discovery URLs
| Provider | Discovery URL Format |
| Microsoft (Entra ID) | https://login.microsoftonline.com/{tenant}/v2.0/.well-known/openid-configuration |
| Keycloak | https://{host}/realms/{realm}/.well-known/openid-configuration |
How to Fetch the Document
With curl
# Fetch and pretty-print the discovery documentcurl -s https://keycloak.local/realms/{realm}/.well-known/openid-configuration | python3 -m json.tool# Extract just the authorization endpointcurl -s https://keycloak.local/realms/{realm}/.well-known/openid-configuration | jq '.authorization_endpoint'# Extract the JWKS URIcurl -s https://keycloak.local/realms/{realm}/.well-known/openid-configuration | jq '.jwks_uri'
Links
- https://documentation.cloud-iam.com/resources/passwordless-webauthn.html
- https://documentation.cloud-iam.com/resources/identity-provider-oidc.html
- https://documentation.cloud-iam.com/resources/mfa.html
- https://github.com/lynn-beckman/KeycloakDockerCompose
- https://www.authgear.com/post/well-known-openid-configuration/
- https://learn.microsoft.com/en-us/entra/architecture/auth-oidc
- https://oneuptime.com/blog/post/2026-02-16-how-to-configure-openid-connect-authentication-for-a-web-application-using-microsoft-entra-id/view
One Reply to “”
Comments are closed.